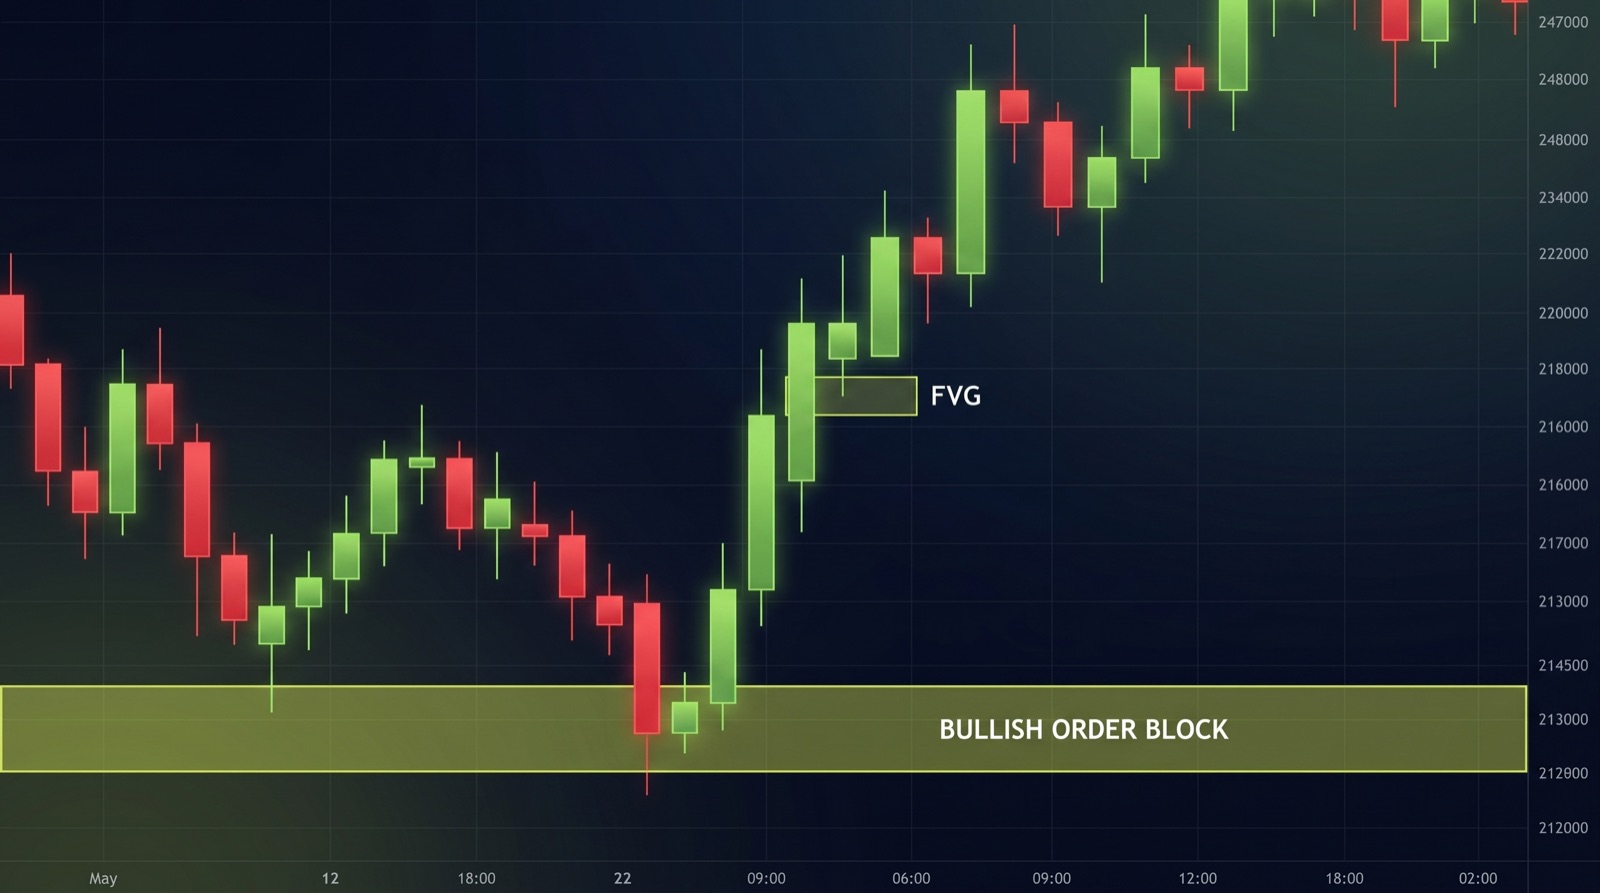
If Fair Value Gaps are the imbalance price leaves behind, Order Blocks are the launch pad it leaves from. An Order Block marks the spot where large orders were filled right before a strong move — and the market has a habit of returning to that level before continuing.
This guide breaks down what an order block really is, how to tell a strong one from a weak one, and how to turn that into a clean, repeatable entry.
What an Order Block Actually Is
An Order Block is the last opposing candle before a decisive, impulsive move — the last down-candle before a strong rally, or the last up-candle before a sharp drop. It represents the price range where institutional orders were absorbed before the market took off.
Why does it matter? Because not all of that institutional interest gets filled at once. When price drifts back to the block, the remaining orders — plus traders who missed the first move — tend to react there. That reaction is the edge.
Order Blocks are the natural companion to Fair Value Gaps. If you haven't yet, read how Fair Value Gaps actually work — the two structures form together, and the data section below shows how each one behaves.
What Separates a Strong Block From a Weak One
A box on a chart is not a signal. What makes an order block worth trading is the quality of the move that created it:
- Impulse. The move out of the block should be strong and decisive — the more aggressive the departure, the more meaningful the zone.
- Imbalance. A genuine block usually leaves a Fair Value Gap behind it. That unfilled gap is a magnet that pulls price back to the zone.
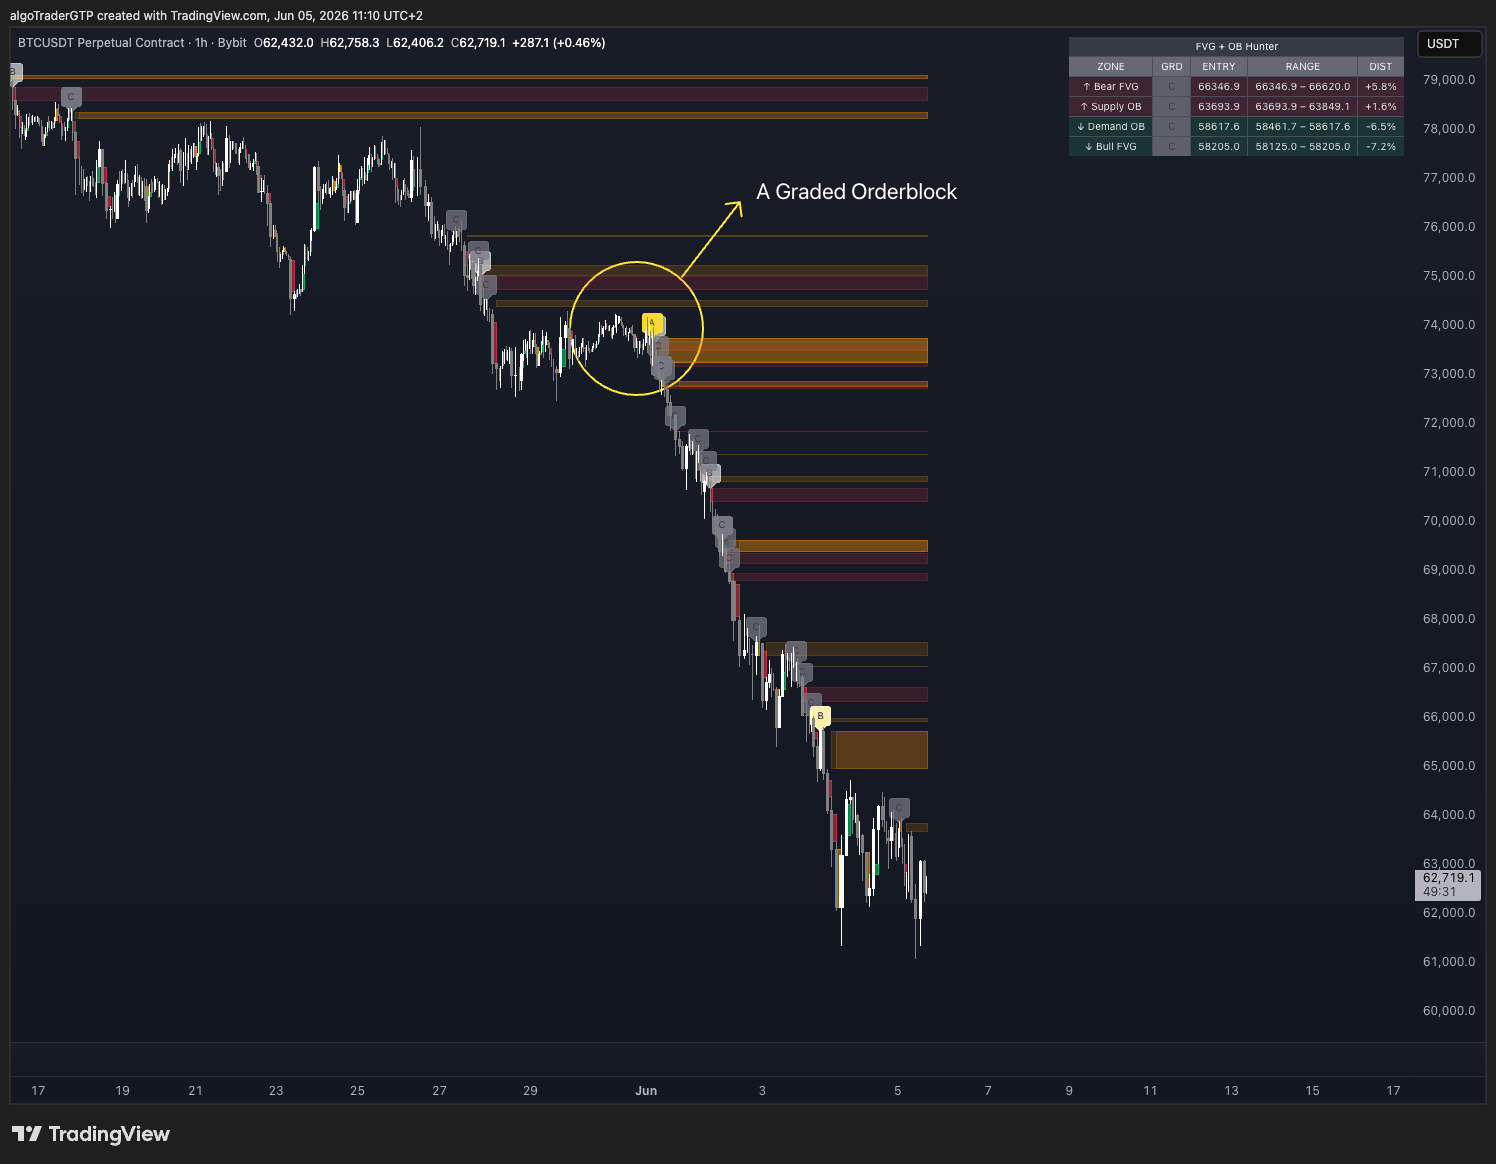
- Freshness. An unmitigated block — one price hasn't returned to yet — carries more weight than one that's already been tested several times.
- Location. A block at a logical level of support or resistance, or in confluence with a higher timeframe, is far stronger than one in the middle of nowhere.
How to Trade an Order Block
- Mark the block — the last opposing candle before the impulsive move.
- Wait for the retest. The trade is the return to the zone, not the impulse that made it.
- Decide the entry before price arrives — at the near edge of the block, or on a reaction inside it (a rejection wick, a shift in momentum). In our data waiting for a rejection candle did not raise the hit rate, so pick the entry that gives you the stop you want.
- Stop beyond the block. If price closes cleanly through the zone, the block is mitigated and the idea is invalid — exit by plan.
Because order blocks describe how price moves, the same rules apply to crypto, stocks, gold, or forex — and to any timeframe.
This is educational, not financial advice. Order blocks describe structure, not certainty — price can and does close through them. Always define your invalidation and size positions for risk.
Order Block Rules: Valid, Invalid, and Used Twice
Three questions come up on every block, so here are the rules in one place.
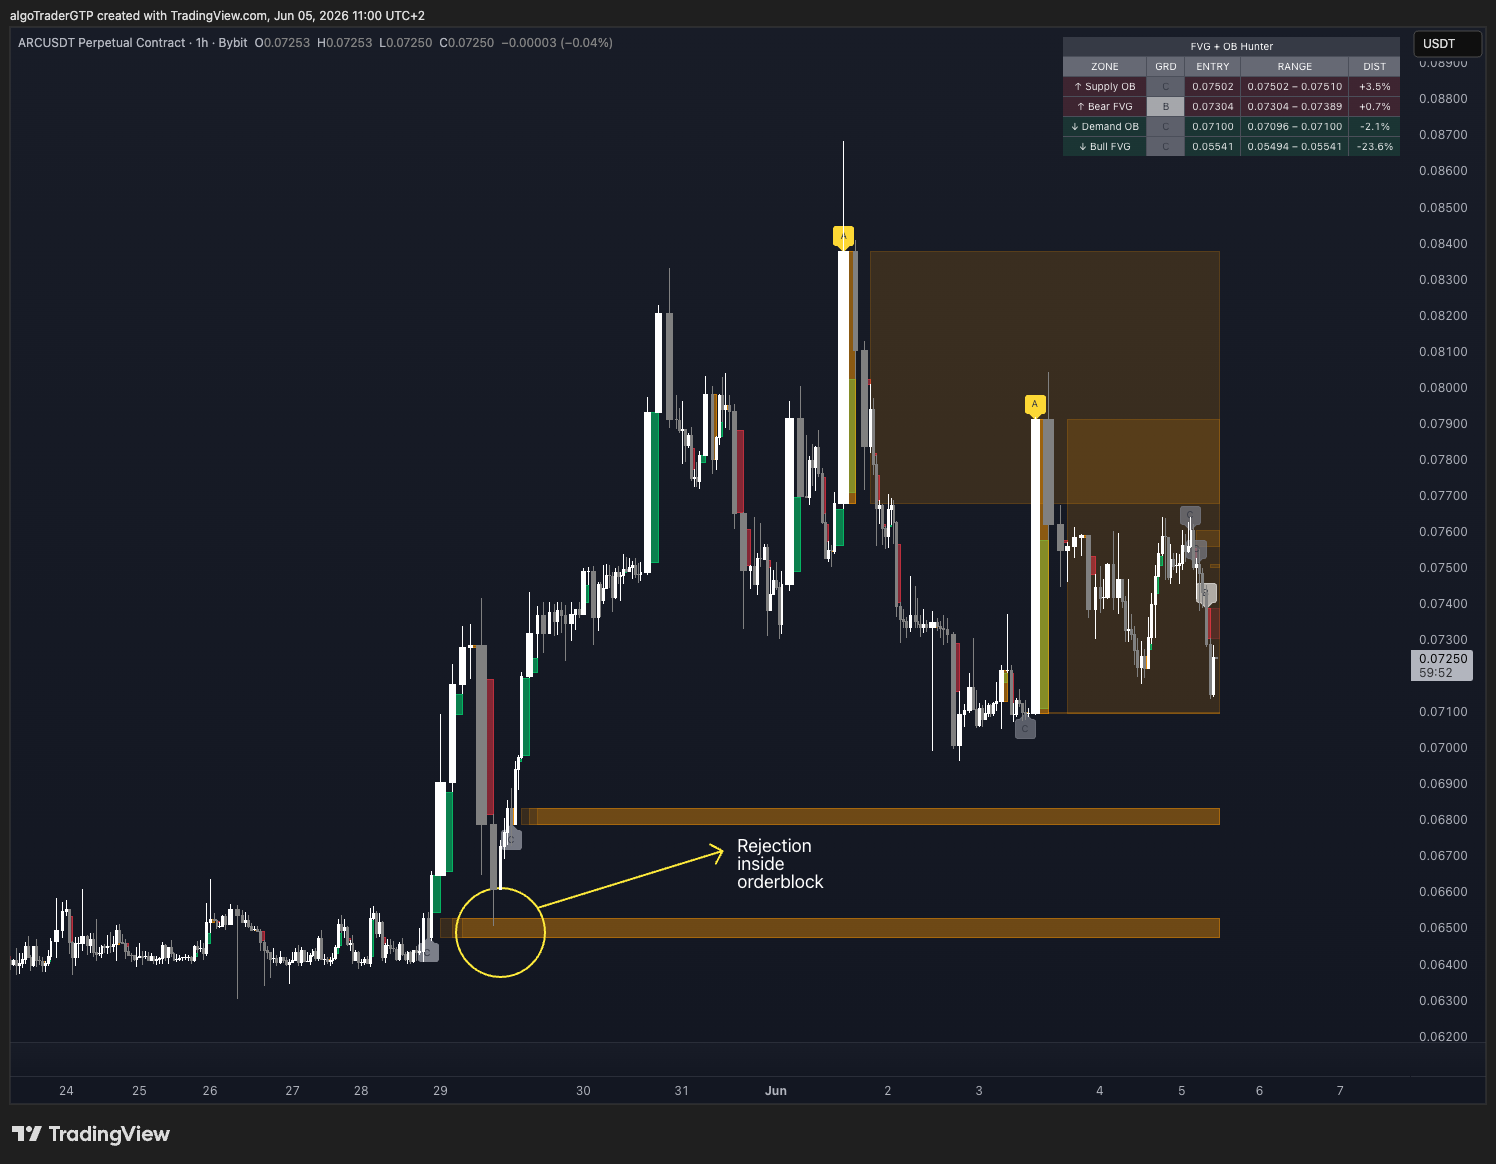
When is an Order Block valid? When the candle you marked is followed by an impulsive move that breaks a prior swing high or low, ideally leaving a Fair Value Gap right after it, and price has not yet closed through the zone. A candle with no impulse after it is just a candle.
When is it invalid? The moment price closes cleanly through the block. The zone is mitigated, the resting orders are gone, and the level often flips — old demand becomes supply and vice versa. A wick through the zone is a test; a close through it is an invalidation.
Can a block be used twice? Price can revisit the same block more than once, but every touch consumes part of the orders that made it work. The first retest is the highest-probability trade. A second or third visit needs fresh evidence — a new gap into the zone, a higher-timeframe level, a volume spike — before it deserves risk. Zone detectors that track state (fresh, tested, mitigated) make this visible instead of a judgement call.
What Two Years of Data Say About Order Blocks
Rules are only as good as the evidence behind them, so we measured every order block on 15 Bybit crypto perpetuals over two years, as part of our fair value gap study. A block is the body of the last opposite-coloured candle before a fair value gap, graded by its height against ATR(14). It counts as rejected when price touches it and closes back out on the side it came from before any candle closes through it, within 200 candles.
| Order blocks rejected | 15m | 1h | 4h | 1D |
|---|---|---|---|---|
| Grade A (≥ 1.0× ATR) | 73.4% ± 0.3 | 70.4% ± 0.8 | 74.0% ± 1.4 | 70.5% ± 2.9 |
| Grade B (≥ 0.5× ATR) | 66.9% ± 0.2 | 67.0% ± 0.4 | 65.0% ± 1.0 | 68.9% ± 1.5 |
| Grade C (< 0.5× ATR) | 55.4% ± 0.1 | 56.1% ± 0.3 | 55.2% ± 0.5 | 55.7% ± 0.8 |
| Grade A fair value gap, for comparison | 75.6% | 76.7% | 74.0% | 79.4% |
| Grade A blocks measured (n) | 17,293 | 3,732 | 958 | 244 |
Share of zones rejected ± one standard error · all 15 coins · 15m–4h over two years, daily over each coin’s full Bybit history. Every table is free to download under CC BY 4.0 on the study data page.
What that means when you trade a block:
- Size is the first filter. A block at least one ATR tall was rejected roughly seven times in ten on every timeframe; a block under half an ATR, a little over half the time. Part of that is geometry, since a taller zone needs a bigger candle to close through it, but it tells you which boxes deserve your attention.
- No timeframe makes a block better. The rates sit within a few points of each other from 15 minutes to daily. Choose the timeframe for your holding period and your fees, not for accuracy.
- Blocks and gaps behave alike. A grade A fair value gap was rejected a little more often than a grade A block on the 15-minute, hourly and daily charts, and at the same rate on the 4-hour. Overlap is not an extra edge: in none of the eight comparisons we ran did a gap with a block right behind it do better than a gap on its own.
- A reaction is not yet a trade. Buying the first touch of a grade A block, stop beyond it and target at 3:1, won 25.4% of the time on hourly charts of ten coins we never used to form an idea. A 3:1 trade needs 25% to break even, before fees and slippage. The result comes from how you build the trade: where the target sits, how wide the stop is, and what the fees cost.
- Small blocks win more often and pay more in fees. Grade C blocks reached 3:1 more often (32.5% on the same hourly test) because their stops are about five times tighter, 0.44% against 2.18% on average, and the same fee is a much bigger share of a tight stop.
Every figure is measured before slippage and funding. The full method, the held-out coins and the five rules that follow from it are in How to Turn Fair Value Gaps Into High-Quality Trades.
Find Every Block Automatically
Marking and grading order blocks by hand across multiple timeframes is slow, and it's where most traders miss the best zones. ZoneHunter Pro detects every order block and fair value gap the moment it forms, grades each zone by strength, and alerts you when price returns — so you only act on the blocks that matter. It runs on TradingView as a one-time purchase. Want a full walkthrough? See how to use ZoneHunter Pro.
Prefer to follow along? The free AlgoTraderPro Telegram channel posts the setups the desk takes. See how the signals work.
Trade where smart money entered — wait for the block, wait for the reaction. Disclosure: some links above are affiliate or product links — if you buy through them, AlgoTraderPro may earn a commission at no extra cost to you.